Natasja was kind enough to find time to play with our supplies and scrap specially for our blog. Her work is beautiful as always.
Thank you, Natasja!
Thank you, Natasja!

This is a wonderful Succot dessert because it highlights the seasonal fall fruits.
Ingredients:
- 2 cups flour - 1 tablespoon sugar - 1 ½ sticks margarine - ½ cup cold water Filling Ingredients: - 3 baking apples - 2 ripe pears - 3 tablespoons sugar, divided - 1 teaspoon cinnamon - 4 tablespoons margarine, divided
How to do it: 1. Preheat oven to 400°F.
2. Mix flour and sugar together in the mixing bowl. Cut the 1½ sticks of margarine into slivers; add to the flour and sugar. Blend together with your fingers or the pastry cutter until the mixture looks like lumpy peas.
3. Slowly add the water and knead by hand until soft dough forms. With the rolling pin, roll the dough out into a large circle the size of a dinner plate and place dough onto the cookie sheet.
4. Use the vegetable peeler to peel apples and pears. With the sharp knife, cut out the cores. Quarter and slice the fruit. Pile the fruit slices onto the center of the dough. Leave an approximately 2" border of dough around the fruit.
5. Mix 2 tablespoons of sugar and the cinnamon in a small bowl. Sprinkle the apples and pears with this mixture. Cut 2 tablespoons margarine into small pieces and scatter the small pieces of margarine on top of the fruit.
6. Fold the dough up and around the mound of apples and pears.
7. Place remaining 2 tablespoons margarine into a microwave-safe bowl. Melt the margarine in the microwave for 30 seconds. With a pastry brush, brush the crust with the melted margarine and sprinkle remaining tablespoon sugar over the crust.
8. Bake for 45 minutes–1 hour. Remove from the oven and transfer to a serving plate. Cut into wedge-shaped servings.
Estimated prep time: 30 minutes Bake time: 45 minutes – 1 hourParve • Yield: 8 servings

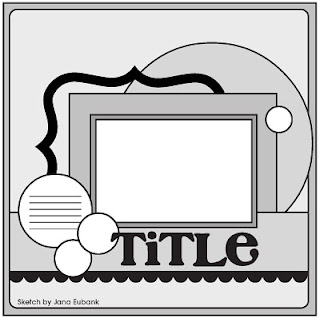
 The layering and scalloped edging on this sketch really caught my eye. Sketches can be interpreted in any way you wish. They can be "down-sized" to make a card or you can even use this one to make an 8 1/2 x 11" page. Be creative!
 Here's my formula for simple but quick handmade cards:

